
May 19, 2025 · 9 min read
Tick Bite Prevention for Travel in Ajax: A Trail-to-Home Routine
Build a tick prevention routine in Ajax before hiking or travelling, with practical advice on clothing, repellents, body checks, removal and getting care.
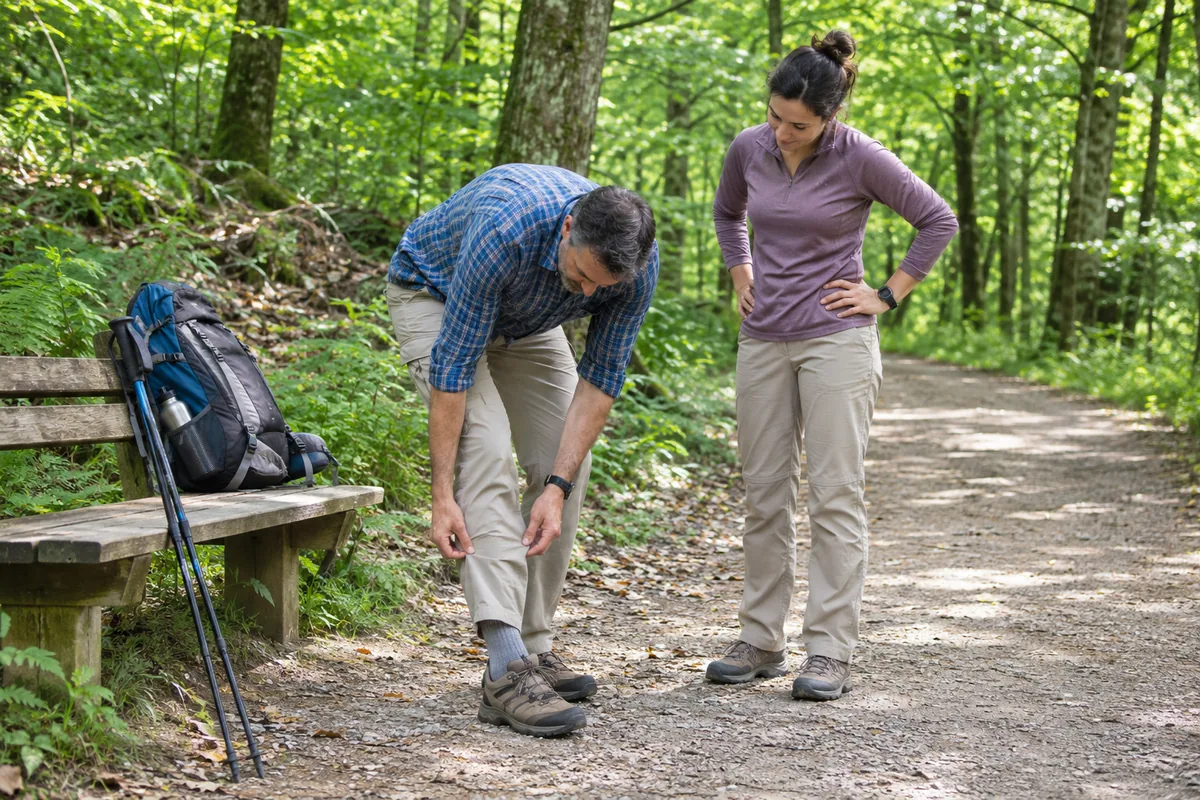
The easiest tick check to remember is the one that already has a place in your day. It might happen before a shower after a local walk, when everyone changes after a camping excursion, or before you unpack a backpack in a guest room. A routine is especially helpful during travel, when unfamiliar schedules make ordinary habits less reliable.
Tick bite prevention for travel in Ajax begins with understanding where you will spend time outdoors and preparing for the journey back indoors. A woodland holiday, a visit to relatives with a rural property, and several days of fieldwork can all create opportunities for exposure. The goal is to keep enjoying those activities while making clothing, repellent, checks, and prompt action easy to manage.
Map the activities, not only the destination
Start by writing down what you expect to do between hotel stays. Walking through brush, gardening, camping, or sitting beside long grass may matter more than the name of the nearest city. Ask your host or guide about the terrain and whether ticks are a concern locally. A paved sightseeing itinerary and a wildlife photography trip can need different preparation even within the same region.
Tick species and the infections they carry vary geographically. Do not assume the advice for an Ontario outing covers every overseas destination. For example, tick-borne encephalitis is a consideration in certain areas of Europe and Asia, particularly for outdoor exposure. The Government of Canada’s explanation of tick-borne encephalitis risk is a useful starting point for an itinerary discussion.
Keep the exact region and dates in your notes. If you later need medical advice, “I went hiking outside a particular town last week” is much more informative than “I travelled in Europe.” This also helps a clinician decide whether any destination-specific prevention should be discussed before departure. A vaccination for one infection would not replace measures against tick bites generally.
Choose clothing you will actually wear
Long trousers, closed footwear, and a long-sleeved shirt provide a practical starting point in tick habitat. Light-coloured fabric makes a small moving tick easier to see. Tucking trousers into socks and a shirt into trousers can reduce openings. Walk on cleared trails where possible and avoid brushing against vegetation. These measures are included in Canada’s tick bite prevention advice.
Try the clothing before packing it. If trousers are so hot or restrictive that you know you will abandon them, look for a more comfortable option suitable for the climate. Check whether socks stay in place while walking and whether the shirt works under your daypack. Comfort supports consistency during a long excursion.
Set aside a clean change for the return journey. On a trip with a shared vehicle, a simple bag for worn outdoor clothing keeps it separate while you arrange proper checking and laundering. Label each person’s bag if several family members have similar gear. A little organisation can prevent clothes from being tossed onto beds before anyone remembers the tick routine.
Match repellent to the person and product label
Choose a Health Canada-authorized insect repellent appropriate for the user’s age and the planned exposure, then follow its label. Products containing DEET or icaridin are among the options used for tick protection. Check the instructions for application, reapplication, and restrictions; a familiar brand name does not mean every bottle has the same formulation. Health Canada’s repellent guidance explains how to choose and use these products.
Keep the bottle somewhere accessible when dressing for the outing. Repellent stored at the bottom of a locked suitcase is easy to forget when a driver arrives early. If several adults share responsibility for children, agree who applies it and when. This avoids both missed applications and unnecessary duplication.
Permethrin-treated clothing is different from repellent applied to skin. Use registered treated garments according to their instructions and follow any age or laundering restrictions. Never apply a clothing treatment directly to skin. Avoid improvising with agricultural or household pesticide products; they are not interchangeable with products intended for personal protection.
Make a small, useful tick kit
You do not need an elaborate collection of gadgets. Clean fine-point tweezers, a small sealable container or bag, a way to clean the skin, and a phone or notebook for recording details cover several practical needs. Put the kit with supplies that already travel in your daypack, rather than reserving it for a large first aid box that stays behind.
Check the tweezers before departure. A blunt cosmetic pair may be awkward for grasping a small tick close to the skin. Make sure the person who will use them can see well enough and has a steady place to work. A compact light or mirror may be useful for checking less visible areas after an evening return.
For a family outing, explain the kit calmly. Children do not need a frightening account of every possible disease. They need to know that they should tell an adult about a crawling insect or an unusual spot and that checking after outdoor play is normal. Our travel first aid kit guide can help place these supplies within a broader packing plan.
Give the return indoors its own routine
After time in tick habitat, inspect the body carefully, including behind the ears and knees, around the waist, under the arms, and through the hair. Use a mirror or ask a trusted person to help with areas you cannot see. Showering soon after coming indoors can help identify ticks and remove those that have not attached. It does not replace a careful check.
Look over outdoor gear and pets as well. Follow public health instructions for handling and drying clothing; the appropriate process depends on whether clothing is dry or wet and on the item’s care requirements. The CDC’s advice for returning indoors after tick exposure covers these steps alongside body checks. Save the relevant instructions before a trip where internet access may be limited.
Build in privacy and enough time. A hurried glance at ankles in a busy car park is different from a complete check after changing. If you are camping, identify where you can check comfortably with suitable lighting. Travellers with limited reach or vision may want to arrange assistance in advance rather than discover the difficulty at bedtime.
Group trips benefit from a reminder that does not require anyone to disclose private information. A leader can announce time to change and check after the outing, then leave each person to manage the process appropriately. For children at a camp or family gathering, establish which responsible adult will help and respect the child’s comfort and privacy. If the itinerary ends with a restaurant meal before returning to accommodation, consider whether the schedule can include an earlier stop to change. Prevention becomes easier when the day’s organiser makes room for it, instead of assuming everyone will remember after a late dinner and a long drive.
Remove an attached tick promptly and carefully
If you find a tick attached to the skin, use clean fine-point tweezers to grasp it close to the skin and pull straight out with slow, steady traction. Avoid squeezing the body or twisting. Clean the area afterward. If mouthparts remain and cannot be removed easily, leave them alone rather than digging into the skin. Seek help if removal is difficult or you are uncomfortable doing it. Follow Canada’s tick removal instructions.
Do not burn the tick or cover it with petroleum jelly, nail polish, or similar substances. These approaches can delay removal and are not the recommended method. If you want to keep the tick for identification, place it in a sealed container after removal. A clear photograph and a written note can also be useful.
Record the date, location of possible exposure, body site, and your best estimate of when the tick could have attached. Do not invent certainty if you are unsure. An honest range, such as the period since the last thorough check, is more useful than a precise number with no basis. Store the details somewhere you can find again if symptoms develop later.
Know when to ask about preventive treatment
A tick bite does not automatically mean you need antibiotics. In some circumstances, a clinician may consider preventive treatment for Lyme disease based on the tick, exposure location, attachment history, and timing. The assessment is time-sensitive: Ontario’s clinical guidance considers whether the tick was removed within the previous 72 hours, alongside other criteria. Contact a healthcare provider promptly rather than waiting for a rash if you think a higher-risk bite occurred. Ontario Health’s tick bite guidance
Do not take leftover antibiotics or assume a companion’s prescription fits your situation. Preventive treatment decisions are distinct from treating an established illness. They also do not provide blanket protection against all infections that ticks can transmit. Continue watching for symptoms even if a clinician has recommended a preventive medicine.
Identification services can help determine the type of tick, but waiting for an image response should not delay necessary medical advice. Bring your exposure notes to the discussion. If you are abroad, explain where the bite occurred and ask for written documentation of any assessment or treatment to share when you return to Ajax.
Watch for illness without waiting for a perfect rash
An expanding rash, fever, unusual fatigue, headache, or muscle and joint pain after possible tick exposure should prompt medical assessment. Lyme disease does not always produce a classic target-shaped rash, and some people have no rash. Tell the clinician about outdoor exposure even if you never noticed an attached tick. Canada’s Lyme disease symptom guidance describes the range of early and later features.
Do not use a photograph comparison to rule illness out. Skin changes can be harder to notice on different skin tones or in places that are difficult to inspect. A dated photograph can help show progression, but it is supporting information rather than a diagnosis. Seek urgent medical help for severe illness, confusion, significant weakness, or other concerning neurological symptoms.
Keep the trip history available after unpacking. A bite that happened near the beginning of a multi-stop holiday can be easy to forget by the time you feel unwell. Include locations visited at home as well as abroad. A clinician needs the whole exposure story, not only the most distant destination.
Turn the plan into a habit before departure
Use a local outdoor day to test your arrangement. Check whether everyone knows where the repellent is, whether the clothing is comfortable, and whether the return-home routine takes place before people become distracted. Adjust what is awkward. Travel is usually a poor time to introduce a complicated system that nobody has practised.
For longer outdoor trips, bring the route and activity schedule to a travel health consultation. Discuss the countries, seasons, accommodation, and distance from medical help, alongside routine vaccine and medication needs. Tick prevention becomes more manageable when each step has a clear place: prepare before the walk, reduce exposure outside, check afterward, and respond promptly when something needs attention.